Setting Up Cloudflare Magic Transit
Setting Up Cloudflare Magic Transit
What are we doing?
In this post, we’re configuring a Cloudflare Magic Transit tunnel between an origin and Cloudflare. (In this example, we’ve got an origin based in GCP, but it could be anywhere.)
Why would we want to do this? Cloudflare’s CDN service provides DDoS protection at the application layer (L7) but not at the network/transport layer (L3/4). Magic Transit will protect our services against L3/4 attacks. It works by advertising your IP address space from Cloudflare’s network, so that all IP traffic destined for your systems gets routed via Cloudflare.
Prerequisites
For this example, we’re assuming that you’ve already allocated a /24 IP subnet and onboarded with Cloudflare. This tutorial covers the subsequent steps - configuring the GRE tunnels between your origin and Cloudflare.
Create your instance
Create a new instance. If you’re using GCP, you want to make sure IP forwarding is enabled.
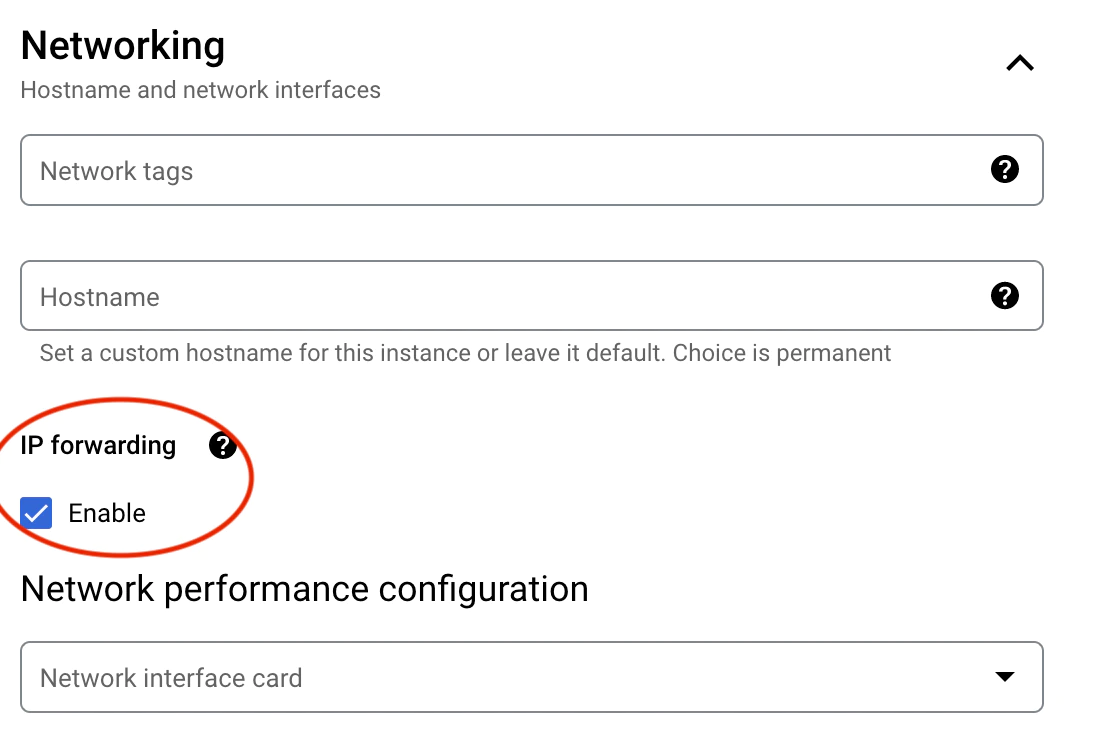
Allow GRE (47) and ICMP in your firewall rules.

Note down your IPs
Note down your instance’s internal and external IPs.
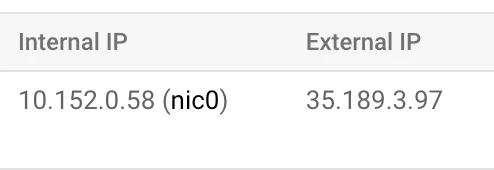
Also note down:
-
An arbitrary /31 subnet for the GRE tunnel endpoints to use. In this case we’re using 10.40.1.10/31 - 10.40.1.10 will be IP on the GCP instance and 10.40.1.11 will be the Cloudflare endpoint IP.
-
An unused IP address that is part of the /24 subnet you have allocated to Magic Transit. In this case we’re using 8.31.160.17.
-
The Cloudflare anycast public IP that is assigned to your Cloudflare account. In this case we’re using 162.159.64.19.
So our key IPs are:
-
GCP instance internal IP: 10.152.0.58
-
GCP instance external IP: 35.189.3.97
-
GRE tunnel subnet: 10.40.1.10/31
-
Instance IP: 10.40.1.10
-
Cloudflare IP: 10.40.1.11
-
-
Magic Transit public IP: 8.31.160.17
-
Cloudflare anycast public IP: 162.159.64.19
Configure your instance
Connect to your instance via ssh. Replace the IPs at the top with your own IPs, then run the following commands.
Set the IPs you’re going to use as environment variables:
export EXT_IP=35.189.3.97
export INT_IP=10.152.0.58
export MT_IP=8.31.160.17
Create a GRE tunnel to Cloudflare, and associate your Magic Transit IP to the loopback device:
sudo ip tunnel add gre1 mode gre local $INT_IP remote 162.159.64.19 ttl 255
sudo ip addr add 10.40.1.10/31 dev gre1
sudo ip link set gre1 up
sudo ip addr add $MT_IP scope host dev lo
Enable IP forwarding and disable source address validation:
echo 'net.ipv4.ip_forward=1' | sudo tee -a /etc/sysctl.conf
echo 'net.ipv4.conf.all.rp_filter=0' | sudo tee -a /etc/sysctl.conf
sudo sysctl -p
Send your return traffic back over GRE tunnel to avoid GCP dropping asymmetric traffic:
(Note: this step only applies if you’re using a cloud provider like GCP, AWS, or Azure. If you’re connecting your on-prem systems to Magic Transit, you can safely skip this step - replies will route back to the source unencapsulated, and not via Cloudflare.)
echo '100    magic' | sudo tee -a /etc/iproute2/rt_tables
sudo ip route add default via 10.40.1.11 table magic
sudo ip rule add from $MT_IP/32 table magic
Configure the Cloudflare side
Create GRE Tunnels
From the Cloudflare dash, go to Magic Transit → GRE Tunnels and Static routes configuration → GRE Tunnels. Then click Create.
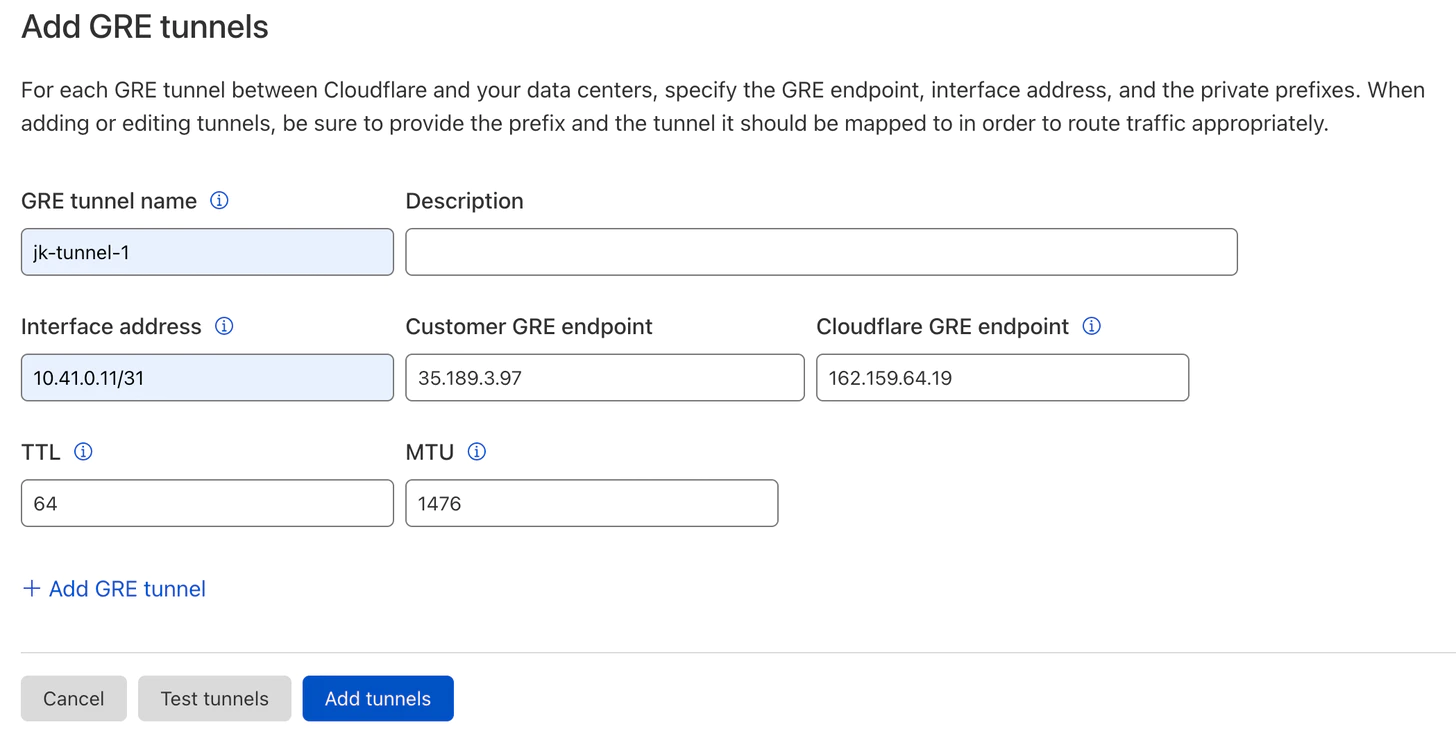
-
Interface address is the Cloudflare IP from the GRE tunnel subnet.
-
Customer GRE endpoint is the GCP instance external IP.
-
Cloudflare GRE endpoint is the Cloudflare anycast public IP.
Then hit Add tunnels.
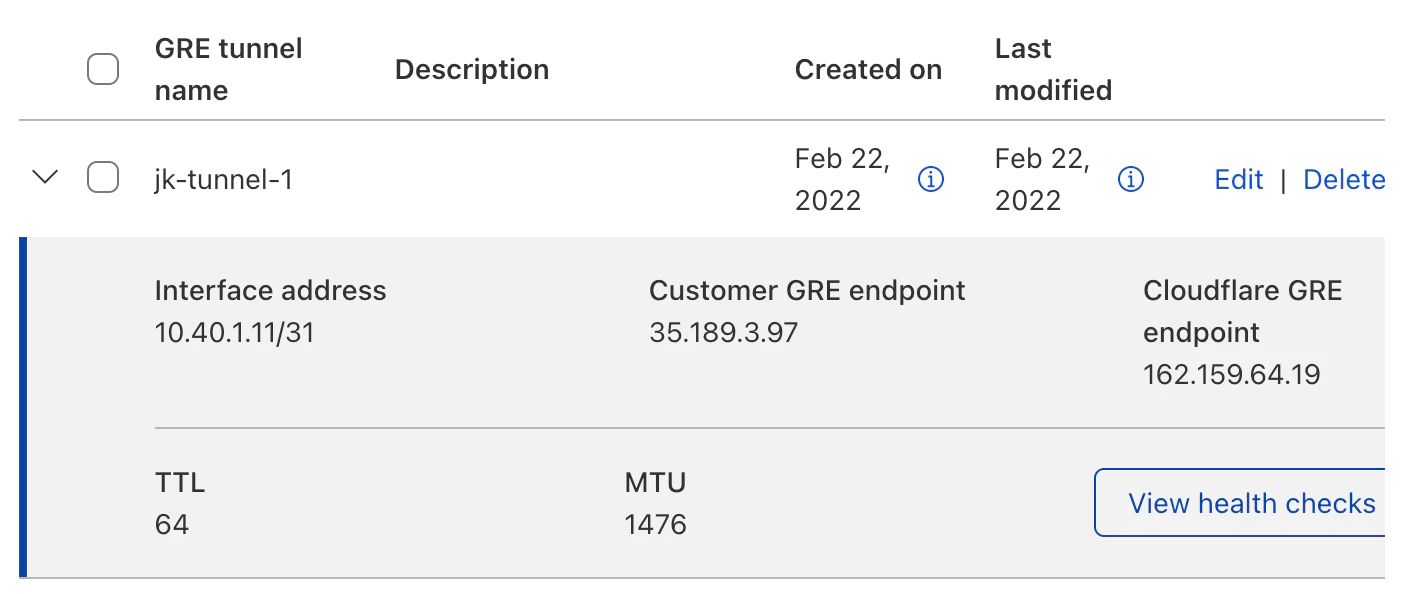
Your GRE tunnel should look like this:
Create Static Routes
Next, go to Magic Transit → GRE Tunnels and Static routes configuration → Static Routes. Then click Create.
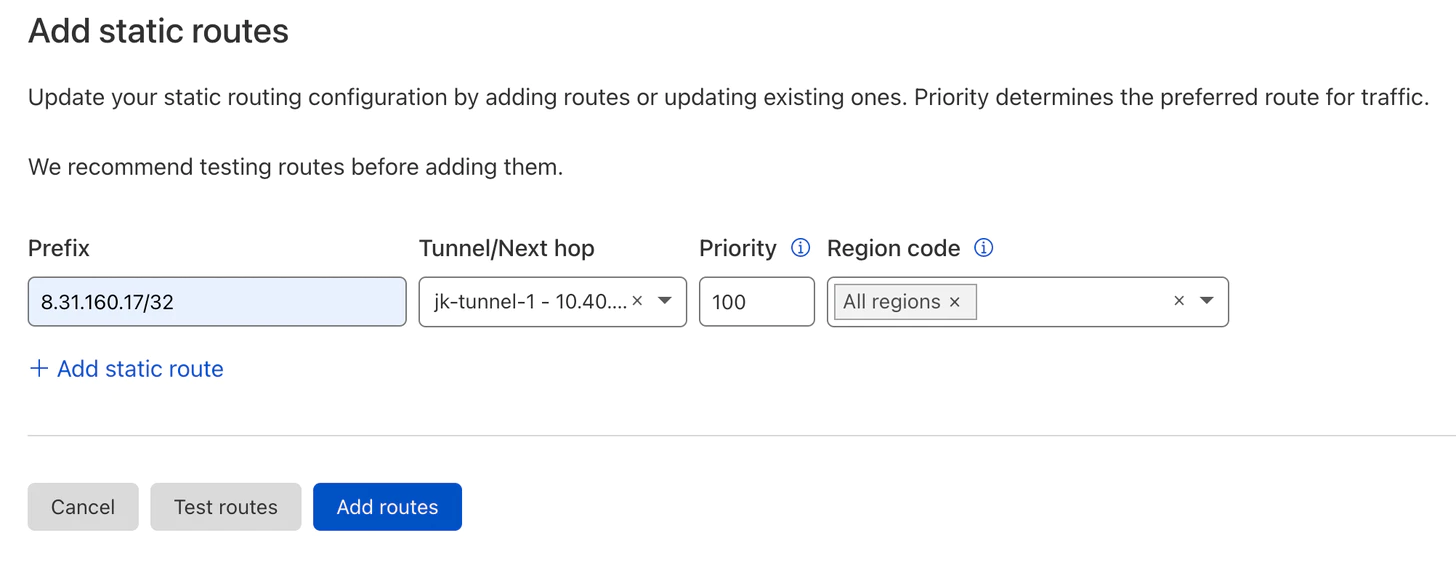
-
Prefix is the Magic Transit public IP from the /24 that you assigned previously to Magic Transit.
-
Tunnel/Next hop is the name of the GRE tunnel that you created in the previous step.
Then hit Add routes.
Your static route should look like this:

Connect to your Cloudflare IP
Run tcpdump on your instance (you might need to exclude GCP hosts):
sudo tcpdump  ! host 97.3.189.35.bc.googleusercontent.com
tcpdump: verbose output suppressed, use -v or -vv for full protocol decode
listening on gre1, link-type LINUX_SLL (Linux cooked), capture size 262144 bytes
Then open up a terminal on your local machine and try pinging your Magic Transit IP:
ping 8.31.160.17
PING 8.31.160.17 (8.31.160.17): 56 data bytes
64 bytes from 8.31.160.17: icmp_seq=0 ttl=56 time=13.559 ms
64 bytes from 8.31.160.17: icmp_seq=1 ttl=56 time=12.387 ms
64 bytes from 8.31.160.17: icmp_seq=2 ttl=56 time=12.351 m
You should see ICMP traffic on your instance:
03:34:58.509821 IP 115-64-113-250.static.tpgi.com.au > 8.31.160.17: ICMP echo request, id 22247, seq 0, length 64 03:34:58.509862 IP 8.31.160.17 > 115-64-113-250.static.tpgi.com.au: ICMP echo reply, id 22247, seq 0, length 64 03:34:59.513699 IP 115-64-113-250.static.tpgi.com.au > 8.31.160.17: ICMP echo request, id 22247, seq 1, length 64 03:34:59.513744 IP 8.31.160.17 > 115-64-113-250.static.tpgi.com.au: ICMP echo reply, id 22247, seq 1, length 64 03:35:00.518785 IP 115-64-113-250.static.tpgi.com.au > 8.31.160.17: ICMP echo request, id 22247, seq 2, length 64 03:35:00.518820 IP 8.31.160.17 > 115-64-113-250.static.tpgi.com.au: ICMP echo reply, id 22247, seq 2, length 64
Next Steps
If you wanted to, you could use a tool like hping3 to run a DDoS simulation against your Cloudflare IP to prove that Cloudflare was dropping those packets before they hit your origin. Make sure you open a support ticket to Cloudflare first to warn them of the simulation.